
When working on drywall, plasterboard, or other interior finishing projects, choosing the right joint compound can make a noticeable difference. The compound you use affects how easily you can cover seams, repair imperfections, create smooth surfaces, and prepare walls for painting.
For many DIY homeowners and contractors, compound Home Depot searches are a practical starting point because Home Depot carries several types of drywall and joint compounds for different project needs. However, the best product depends on the job, your experience level, drying time, and the finish you want.
This guide explains the main types, common uses, application tips, and important factors to consider before buying.
What Is Joint Compound?
Joint compound is a spreadable material used mainly to finish drywall. It helps cover joints between drywall panels, embed joint tape, fill screw holes, and smooth minor surface imperfections.
After it dries, you can sand the compound to create an even surface. Once the wall is properly prepared, it can receive primer and paint.
Joint compound is sometimes called drywall mud or simply mud. Although different products vary in formulation and performance, they all serve the basic purpose of creating a smoother, more finished wall surface.
Types of Compound Available at Home Depot
Not every drywall project needs the same compound. Understanding the main categories can help you avoid buying a product that does not suit your application.
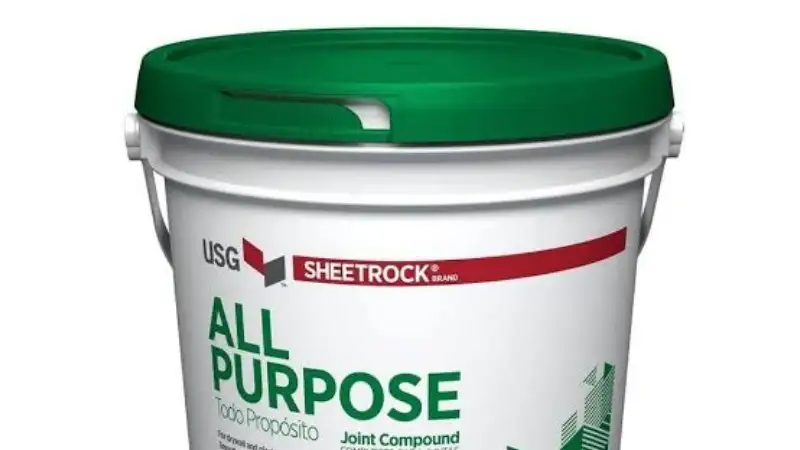
1. All-Purpose Joint Compound
All-purpose compound is one of the most versatile options. It can typically be used for taping drywall joints, covering fasteners, finishing seams, and performing general repairs.
It is a useful choice for homeowners who want one product for several stages of a project. The trade-off is that all-purpose compound may not offer the easiest sanding or fastest drying compared with specialised formulas.
For a small bedroom repair or a standard drywall installation, an all-purpose product can often handle most of the work.
2. Lightweight Joint Compound
Lightweight compounds contain less weight than traditional formulations, making them easier to handle and often easier to sand.
This can be particularly helpful when you have many joints to finish or expect to spend considerable time working overhead. Less physical effort can make a long drywall project more manageable.
However, lightweight does not automatically mean better for every task. Always check the product label for its recommended applications.
3. Setting-Type Compound
Setting-type compounds come as powders that you mix with water. They are designed to harden within a specified working time, such as 20, 45, or 90 minutes, depending on the product.
Their relatively fast setting can be useful when you need to complete repairs quickly or apply multiple coats within a workday.
The working time matters. Once the material begins setting, you generally have less time to shape and smooth it than you would with a premixed product. Beginners may therefore find premixed compound easier for smaller projects.
4. Topping Compound
Topping compound is designed primarily for finishing rather than initial taping. It can provide a smooth final coat that is easier to sand and refine.
Experienced drywall finishers may use different compounds at different stages to achieve a cleaner result. For a basic DIY repair, however, buying several specialised products may not be necessary.
Common Uses for Drywall Compound
The right compound can solve several common wall-finishing problems.
Finishing Drywall Seams
When drywall sheets meet, the joint needs to be reinforced and covered. Joint tape and compound work together to create a continuous surface.
The compound is normally applied over the taped joint in progressively wider coats. Each coat should dry properly before the next application.
Covering Screw and Nail Heads
Drywall fasteners leave small depressions in the surface. Compound fills these areas and helps make them less visible after sanding and painting.
For best results, avoid applying one excessively thick blob. Several thin applications usually provide better control.
Repairing Small Wall Damage
Joint compound can help repair minor dents, scratches, and imperfections in drywall. Before applying it, remove loose material and make sure the area is reasonably clean.
For larger holes or significant damage, you may need a patch or replacement drywall rather than compound alone.
Creating a Smooth Painting Surface
Paint highlights bumps, ridges, and uneven areas that may not be obvious on an unfinished wall. Proper compound application and sanding help create the smooth base needed for a professional-looking paint job.
How to Choose Compound Home Depot Products
If you are comparing compound Home Depot options, start with the project rather than the brand or container size.
Ask yourself a few simple questions:
What am I repairing?
A few screw holes require a different amount of material than an entire room of new drywall.
Do I need premixed or powder?
Premixed compound saves mixing time and offers convenience. Setting-type powder can provide faster turnaround but requires accurate mixing.
How important is sanding?
If you are new to drywall finishing, a product that sands easily can make the learning process less frustrating.
How quickly do I need to finish?
Fast-setting products can shorten project times, while conventional premixed products give you more flexibility.
How much compound do I need?
Buying too little can interrupt your project, while buying too much may leave you with material you do not need.
Practical Tips for Better Results
Even a good product cannot compensate for poor application technique. A few simple habits can improve the finished wall.
Apply Thin, Even Coats
Thick layers take longer to dry and can become harder to sand. Use a suitable drywall knife and spread the compound evenly.
Feather the Edges
Do not leave a sharp ridge where the compound ends. Gradually thin the edges so the repaired area blends into the surrounding wall.
Allow Enough Drying Time
Drying depends on the product, coat thickness, temperature, humidity, and ventilation. Follow the manufacturer’s instructions rather than assuming the compound is ready after a fixed number of hours.
Sand Carefully
Use appropriate sandpaper or a sanding sponge and avoid aggressive sanding. Excessive sanding can damage the drywall paper underneath and create another repair problem.
Inspect Before Painting
Run your hand and a bright light across the surface. Light can reveal ridges and shallow depressions that are easy to miss under normal room lighting.
Common Buying Mistakes to Avoid
When shopping for compound Home Depot products, it is easy to focus only on price. A cheaper container is not necessarily the best value if it makes the job harder or requires additional products.
One common mistake is choosing a setting-type compound when you need plenty of working time. Another is buying a large container for a very small repair when a smaller package would be more practical.
It is also important to distinguish joint compound from spackle. Both can repair walls, but they are not identical products. Spackle is commonly used for small holes and surface repairs, while joint compound is designed specifically for drywall finishing and joint treatment.
Is Home Depot Compound Good for DIY Projects?
For many routine drywall repairs and finishing jobs, products sold through Home Depot can be suitable for DIY use. The key is matching the product to the project.
A homeowner repairing a few nail holes may need only a small amount of ready-to-use compound. Someone finishing an entire room may benefit from an all-purpose compound, appropriate drywall tape, quality knives, and sanding tools.
The product label should always be the final reference for recommended uses, drying times, storage, and application instructions.
Final Buying Checklist
Before purchasing, consider:
- Project type: repair, taping, finishing, or skim coating
- Formula: all-purpose, lightweight, setting-type, or topping
- Application: premixed convenience or powder mixing
- Drying or setting time: choose according to your schedule
- Sanding: consider ease of finishing, especially for DIY work
- Quantity: estimate your project instead of automatically buying the largest container
- Tools: include knives, tape, sanding materials, and other required supplies
Final Thoughts
Choosing the right compound Home Depot product does not have to be complicated. Start by identifying the job, then compare the compound’s intended use, working time, ease of application, sanding characteristics, and package size.
For general drywall work, an all-purpose compound offers versatility. Lightweight formulas can make larger jobs easier to handle, while setting-type compounds can help experienced users complete repairs faster. Specialised finishing products may also be useful when a particularly smooth surface is the priority.
The biggest difference often comes from technique. Thin coats, proper drying, careful feathering, and controlled sanding can turn an ordinary drywall repair into a clean, paint-ready surface. For more information, visit our website.